Archive | Dessert RSS feed for this section

Summer Lovin’ – Cornmeal Lemon Cookies

4 Jun

Here in good old western Pennsylvania, mother nature has our weather all over the place. Over Memorial Day weekend, the temps were in the high 80’s – low 90’s with hell on earth humidity. (I planted the garden in those temps. It was like taking a shower with your clothes on. meh) That being said, it’s not officially summer, but it’s hard not to think of summertime  flavors for desserts, snacks, and meals. Or the movie Grease…and the song Summer Nights….I remember a sleepover as a teen in the 90’s where I, along with 3 friends, re-enacted the scene in her living room. Ya. That’s how we roll. (Am I the only one that when someone says “oh, 10 years ago…” it makes me think of the 90’s? And then when I realize the 90’s were 20 years ago, I feel old.)  Here’s the video in case you want to give it a try yourself….

Ok…back on topic. Enter in the Cornmeal LEMON Cookie. Yep. LEMON. I love lemon. It’s got that bright tangy flavor that just makes me think of sunshiny poolside outdoor fun. Turn it into a cookie and you’ve got something magical. This recipe was originally found on thekitchn.com for a lime version. Now, I like lime too, but it’s just overpowering in comparison to lemon, so I adjusted the recipe to suit my tastes. There is more vanilla, and more lemon zest and juice because lemons are generally bigger than limes, and I used some big lemons. But the lemons do not overpower these cookies. The cornmeal gives them a nice flavor balance while making the texture more filling, rounded out. But not heavy. I’m not sure how they got only 14-16 cookies out of the recipe since my cookies were palm sized after baking – and I got exactly 24 cookies. But whatevs. The cookies are fantastic. They take almost no time to whip up. Great to take to a bbq, picnic, graduation party. Whatever you find yourself getting into this summer. Enjoy!

Cornmeal Lemon Cookies
Yield: 2 dozen cookies Adapted from thekitchn.com

For the Cookies:

1 1/2 cups whole-wheat flour ( I used white whole wheat)
3/4 cup cornmeal
1/2 teaspoon baking powder
1/4 teaspoon kosher salt

2 sticks room temperature butter (16tbsps)

¾ cup sugar

Zest of 2 large lemons

Juice of 2 large lemons

1 teaspoon real vanilla extract (I used homemade)

2 large eggs


For the icing:

1 1/3 cups powdered sugar, sifted

Juice of 1 large lemon

Zest of 1 large lemon

Preheat your oven to 350 degrees.

In a medium mixing bowl, mix together your flour, cornmeal, baking powder and salt. Set aside.

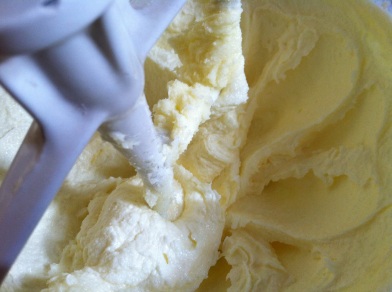
Fit your stand mixer with a paddle attachment and add the butter and sugar to the bowl. Cream the butter and sugar together on medium-high speed until light and fluffy, about 3-5 minutes.

Add the zest of the 2 lemons and the vanilla and mix until just incorporated.

Scrape down the sides of the bowl and add your eggs. (The mixture will separate. Do not fret. It will come together at the end!)

Add your flour mixture in 3 stages, mixing well after each addition.

Using a small cookie scoop, drop by heaping scoopfuls onto 2 cookie sheets lined with parchment paper or silpat mats. Space the cookies 2-3 inches apart and press down with your fingers so the tops of the cookies are flat. Bake for 14 minutes, rotating the cookie sheets halfway through for even baking.

Allow cookies to cool completely.

Icing: in a small bowl, whisk together all of the ingredients. Spoon over the tops of your cooled cookies, letting it drip over the edges. (to help minimize the mess, I put a tea towel under the cooling racks to catch any runaway icing)

Store any leftovers in an airtight container and eat within 3 days. Can’t eat them that fast? Freeze them in a single layer. To serve after freezing, let thaw at room temp for 2hrs before serving. The icing will sweat out a little bit out moisture, but it’s all good. They taste as fantastic as they do freshly made! Enjoy!

Crock Pot Love: Dulce de Leche

22 May

Sooooo, ya. Um, dulce de leche. If you  haven’t ever heard of it, or tasted it….you are SO missing out. But fret not my pretties, for you can have some of you very own with very little hands on time. Yep. Not only is it amazingly delicious, but it requires such minimal efforts on your part that you can do this before going to work!!! And you only need 4 total things to create rich, velvety caramel laden goodness. Additionally, this method isn’t dangerous like the regular method that is floating around the net where you put the WHOLE UNOPENED CAN into your crock pot. Ya. I’d like to not have any explosions of molten hot caramel lava flung around my kitchen. Plus, this way is totally fullproof, because you can SEE the color of the contents and know it’s done.

Mason jars with lids and bands (jelly jars)

sweetened condensed milk (14oz cans)

crock pot

hot tap water

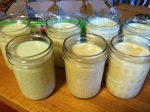
Yep, that’s it. How many mason jars you need depends on how many jars of dulce de leche you want. I wanted to fill my crock pot to make it worth my while so I filled 7 jelly jars. For those 7 jars to be filled, I used 5 cans of sweetened condensed milk.

Method:

Clean your mason jars and lids in hot soapy water. Let air dry or dry with a lint free towel.

Add sweetened condensed milk up to the thick band on the glass right under the threads.

Add the lid and a screw band to finger tight. Put them right into your crock pot. Once you have added all your jars, add hot water (from the tap, not boiling!) to cover the tops of your jars. In my pot, I just added water right up to the lip that the lid rests on. Turn your crock pot on low and set the time (if you have one of the smart crock pots) or set a timer if you do not.

Let them sit in the crock pot for 8hrs if you want a creamy dulce de leche, 9hrs if you want it thicker. I’ve read on the net where they left it in as long as 11hrs, but mine was nice and set at 8hrs. Feel free to check at 8 and if it seems like you want more time added, tack on an additional hour.

Once the jars are the desired color and consistency you want, carefully remove the jars and let rest on the counter overnight to cool. Your jars screw bands may be rusty looking as they did just soak in water for 8 whole hours. Just wipe them off once the jars cool. We have well water so mine had a lovely mineral film on them in addition to rust. Yipee! The jars will seal – but since it is a milk product, put them in the fridge the following day. There is not a lot of info out on the net right now as to shelf life, mostly no one has much left after one month! But, I’m going to freeze a few jars to see if the taste and texture are still good and will update. But I am definitely going to have to freeze some ASAP or there will be none left. None.

Now, wondering what to use this lovely stuff for (other than shoveling it straight to your pie hole with a finger or spoon that is)?  I’ve used some to sweeten tea and coffee. It’s great for an apple or pretzel dip. Mixed into cake icings. As a cake filling. And I’m going to be testing it out in a recipe for a spanish cookie called Alfajores – this stuff is the filling in them. Mmmm.

Don’t be intimidated, it’s just a pumpkin roll!

27 Dec

I’m not sure why, but some people are intimidated by anything that involves rolling up a thin cake with a filling inside. Sure, there is always the possibility that the cake can crack or filling can ooze out, but is that really a cooking failure? You can still eat it! It will still taste delicious even if it doesn’t look as pretty as you think it should.

That being said, as long as you follow the basics and have a nice moist cake, pumpkin rolls and jelly rolls are easy peasy!

This recipe is an adaptation of the Cook’s Country recipe. They know their stuff. I love Cook’s Country – they take all the guesswork out of it for you and stop you from wondering when trying a new recipe if it’s going to be worth it. This is because they are already giving you the best tested version of it!

I only use a double batch of the cream cheese filling for this as I like to be able to still taste the pumpkin in the cake, but don’t feel the single batch is enough filling. Feel free to use the single batch recipe below, or double like I do.

Pumpkin Roll with Cream Cheese Filling

INGREDIENTS

  • 1cup cake flour, sifted
  • 1 teaspoon cinnamon
  • 1/2 teaspoon ginger
  • 1/2 teaspoon nutmeg
  • 1/2 teaspoon baking soda
  • 1/2 teaspoon salt
  • 5 large eggs
  • 1cup sugar
  • 1cup canned pumpkin puree
  • 1 batch cream cheese filling recipe (see below)
  •  Confectioners’ sugar for dusting finished roll

INSTRUCTIONS

Adjust oven rack to the middle position and heat oven to 350 degrees. Grease and 18- by 13-inch rimmed baking sheet and line with greased parchment paper. Whisk flour, spices, baking soda, and salt in medium bowl; set aside. With electric mixer on medium-high speed, beat eggs and sugar until pale yellow and thick, 6 to 10 minutes.

Add pumpkin and mix on low until incorporated. Fold in flour mixture until combined.

Spread batter evenly in prepared pan.

Bake until cake is firm and springs back when touched, about 15 minutes. Before cooling, run knife around edge of cake to loosen, and turn out onto clean sheet of parchment paper that has been dusted with confectioners’ sugar.

Gently peel off parchment attached to cake and discard.

Roll cake and fresh parchment into log and cool completely, about 1 hour. (notice all that powdered sugar all over the counter and the stuff on the counter. That’s what happens when you slap the cake on the parchment!)

Gently unroll cake and spread with frosting, all the way to the edges, leaving 1inch of space at the far end. Re-roll cake snugly, leaving parchment behind. Slice off rough ends (and eat them like it’s your job!) Wrap cake firmly in plastic wrap and chill completely, at least 1 hour or up to 2 days. I slice mine in half and freeze each piece wrapped in a double layer of plastic wrap to enjoy later!

Cream Cheese Filling

Ingredients
4 tablespoons unsalted butter , softened but still cool
1 cup confectioners’ sugar
4 ounces cream cheese , softened, cut into 4 pieces (DO NOT soften in microwave!!!)
3/4 teaspoon vanilla extract

With electric mixer on medium-high speed, beat butter and confectioners’ sugar until light and fluffy, about 2 minutes. Add cream cheese one piece at a time, beating thoroughly after each addition. Add vanilla and mix until no lumps remain.

S’mores Marshmallows – word up.

15 Dec

Ever had a need to whip up a quick sweet for a holiday party and didn’t want to have to bake? These are a great sweet treat to take with you and can be made in not time at all. No baking is required, and minimal time is needed. I have yet to meet anyone who didn’t like S’mores, so these are a hit.

These can also be frozen if you wanted to add them to your holiday cookie trays. And you don’t need a holiday to make them! Any party will do!

Ingredients:

1 bag marshmallows

1 bag chocolate candy melts

1cup crushed graham crackers

Melt chocolate candy melts in the microwave following package directions. Working in batches, dip half of all the marshmallows in the chocolate, and then while the chocolate is still melty dip them in graham cracker crumbs.

Now, you can stop here if you only want to have half of the marshmallows covered in chocolate and graham cracker crumbs. I prefer to cover them completely to keep the marshmallows fresh.

Repeat the process again to cover the other half of the marshmallows and let the chocolate set. Store in an airtight container and freeze until ready to use, or eat right away!

North Pole Cupcakes

17 Nov

Yep, you read that right – North Pole Cupcakes. You don’t even need to be at the North Pole to make them! I made these last Christmas and they were a total hit! And while they look like they may be a little involved, they really are very simple!

Bake up your favorite cupcake recipe – whatever type you like. For mine I made a devils food – from a box mix of course – and then I whipped up some vanilla buttercream – you can use any icing you like that falls into the white icing family. Decorate the cupcakes with the icing, roughly to resemble ‘snow’, and sprinkle with large white sugar crystals to make the ‘snow’ glisten.

Break the hook off of enough candy canes – one for each cupcake – and push into the center of the cupcake, broken end down.

Pick out some red sixlets – again, enough for all of your cupcakes. Make up a glue out of meringue powder and water and place a red sixlet on the top of the candy canes with a little spot of the meringue glue. Let the meringue dry, and tape a little North Pole sign on the front and serve!

What you will need:

cupcakes – use a box mix and follow directions

1 icing recipe – in the white icing family

white decorator sugar crystals

enough candy canes to have one per cupcake

red sixlets for the tops of the poles

meringue powder + water for the ‘glue’

a small North Pole sign for each candy cane pole

people to share them with

North Pole Cupcakes

Guilty Pleasure ~ Caramel Apple CUPCAKES!

21 Oct

I am a huge caramel apple fan. HUGE. When we go to a carnival, festival, or fair, I always have to buy at least one to take home and one to eat at the actual event. They aren’t hard to make at home, but I generally avoid doing it because I don’t want to have to eat them all! So I indulge when I can.

Then I kept noticing on foodgawker.com that there were all these recipes for caramel apple cupcakes and I got to thinking, hmmm….no one recipe struck my fancy and I wanted something that would be easy to whip up and be as healthy as could be since the basic premise of a caramel apple is caramel, and well, an apple. So I wanted a cupcake that infused as much apple flavor as possible. Voila – spice cake mix with applesauce and chopped apple! My sister in law always adds some sour cream into her cake batters for extra moisture so I thought I’d do the same. Love the result. There is alot of apple flavor in these, they’re the perfect portion of sweetness, and they’ll tide me over until I get my next caramel apple fix!

Caramel Apple Cupcakes

1 (18.25-ounce) package spice cake mix
2 large eggs
1 cup sour cream
1/2 cup milk
1/3 cup applesauce (I used homemade cinnamon)
1 large apple, peeled and chopped
1/4 milk
24 wooden craft sticks
Caramel sauce: 1 11oz bag Kraft Caramel bits
1. Preheat oven to 350 degrees. Combine cake mix, eggs, sour cream, milk, and applesauce until incorporated (about 30 seconds). Scrape sides of bowl and then beat on med-high speed for 3 minutes. Stir in chopped apple.

2. Spoon batter into paper-lined muffin pans, filling two-thirds full. Bake 18-20 minutes or until a wooden toothpick inserted in center comes out clean. Do not overbake. Remove to a wire rack to cool.

For Caramel sauce: combine Kraft caramel bits as directed on packaging. I had to use a whisk to get the caramels and water to mix together properly, but the result was just what i was looking for. If you want a thicker caramel sauce, use less water.

Spread caramel mixture over cupcakes. Insert a wooden stick into center of each cupcake. Store covered in an airtight container. It’s best to serve the cupcakes the same day that you add the caramel topping. Otherwise the caramel sauce will soak into the cupcakes. They still taste great, but you lose the presentation effect!

Breakfast or dessert, you decide. I choose both for these pumpkin cinnamon rolls!

17 Oct

I know, I know. Another pumpkin recipe. But it’s one of my favorite flavors and just says “fall” to me. Yes, the pumpkin speaks to me, so there. And the most fabulous thing about these pumpkin cinnamon rolls, other than them tasting fantastic enough to make my husband make moaning noises while stuffing one of these into his pie hole, is that there is NO KNEADING! Happy! Happy! Joy! Joy! I made these this past saturday while I was cleaning the house. I mixed up the dough, let it rise for an hour. Slapped on the filling, rolled them up and let them sit for about 30 minutes before popping them into the oven for 25 minutes. The original recipe is one from The Kitchn, but I had to edit it as they glaze sounded too sugary, I didn’t feel there was enough cinnamon flavor in the filling, and they didn’t say anything about adding the yeast to warm water – the warm water helps activate the yeast. So below is my edited version, and I hope that you enjoy it as much as we do! If you want, you can skip the glaze because they’re good all by themselves….but I added to the glaze because i’m a rebel like that.

Based on what you’ve told us so far, we’re playing this track because it features electronica roots, trip hop roots, rap influences, beats made for dancing and surreal lyrics.

Before glaze

No-Knead Pumpkin Rolls with Brown Sugar Glaze
Makes 12 rolls, Adapted from The Kitchn

Dough
1/4 cup warm water, about 170 degrees
1 tablespoon yeast (1 package)
1 cup skim or 2% milk
1/2 cup butter
1/2 cup sugar
1 15-ounce can pumpkin puree
1 1/2 teaspoons kosher salt
5 cups all-purpose flour

Filling
1/2 cup butter
1 cup packed brown sugar
1 tablespoon cinnamon
1/2 teaspoon ginger
1/2 teaspoon nutmeg

Glaze
1/4 cup butter
1/2 cup skim or 2% milk
1 cup brown sugar
pinch salt
2 cups powdered sugar

Sprinkle the yeast over the water and let it sit a few minutes until the yeast is dissolved.

Meanwhile, warm the milk and butter in a small saucepan on the stove top until the butter is melted. Combine this with the sugar in a large heat-proof mixing bowl and stir until the sugar is completely dissolved.

Let the milk mixture cool until you can touch it – I speed up the process by putting the mixture in a cold bowl that has been placed in the fridge for about 10 minutes.Stir in the yeast and pumpkin. Add the salt and five cups of the flour all at once, stirring until all the flour has been absorbed – I used a dough whisk to speed up the process.  The dough will be sticky, but should come together in a shaggy ball. If it’s still more the consistency of cookie batter, work in an additional 1/2 cup of flour, 1/4 cup at a time.

Cover the dough and let it rise for 1-3 hours in a warm place. Your dough will double in bulk.

To shape the rolls, sprinkle your work surface with a little flour and drop the dough on top. Pat it down into a rough rectangle and using a floured rolling pin, roll it into a rectangular shape about a half an inch thick, longer than it is wide. Sprinkle more flour as needed to keep the dough from sticking.

Melt the butter in the microwave and stir in the brown sugar and the spices. Spread mixture over  dough, leaving an inch of bare dough at the top and about 1/2 in on the edges. Starting at the edge closest to you, roll the dough into a cylinder and pinch it closed at the top.

Spray your baking dish(es) with nonstick cooking spray . Using a sharp knife, cut the cylinder into individual rolls 1 – 1 1/2 inches thick. Place them into your baking dishes so they have a little  room on all sides to rise. Cover with a clean kitchen towel and let  rise until they have puffed up, about 30 minutes. They will rise more in the oven so don’t worry if they aren’t touching yet.

Ten minutes into your dough rising, preheat your oven to 375 degrees. When ready, bake rolls for 20-25 minutes, until the tops are golden and starting to get toasty at the edges.

Prepare the glaze – In a small saucepan over medium heat, combine the milk and butter. When the butter has melted, add the brown sugar and salt. Stir until the brown sugar has melted. Stir in the powdered sugar and whisk to remove any chunks of sugar. Glaze will be pourable but not overly runny.

gettin their glaze on

Let the baked rolls cool for about five minutes and then pour the glaze on top. Eat right away. Share if you feel like it. Any leftovers can be reheated in the microwave for about 30 seconds. These also freeze well, just double wrap in saran and then a layer of foil.

Bliss on a plate.

Mason Jar Obsession – Streusel Topped Pumpkin Pies

12 Oct

I must admit, I am smitten with this idea. Single servings of dessert at hand, totally ready to be made portable if needed or to send home with guests and a party favor. For those of you that are skeptical about the idea of cooking individual pies in mason jars, you can still follow this basic recipe using your pie plate. It will work with the same result, but I will warn you – it’ll be a lot less cute.

To follow this recipe and have it look like mine, you will need a total of 12 4oz jelly jars. There will be enough pumpkin filling for exactly 12 jars.

Here is a list of the total things required:

case of 12 4oz jelly jars

1 can Libby’s pumpkin pie mix, prepared (follow can directions)

1 batch oatmeal streusel topping (recipe at bottom of post)

optional: whipped cream

Directions:

Preheat your oven to 425 degrees.

Place your 12 mason jars on a small rimmed baking sheet. Fill mason jars with pumpkin filling up to the lower rim of the jar (the part underneath the threads for the screw bands – this will leave you 1/2in headspace to put your streusel and still be able to put a lid on the jar). Once you are done with this, sprinkle the tops of each jar with the oatmeal streusel topping – you will have a little bit left over, no worries.

Put pie laden cookie sheet in the oven and let them bake at 425 for 15 minutes. After 15 minutes, lower temp to 350 degrees and let bake for 50 minutes. Once they are done, remove them from the oven and let them cool to room temp. Serve with whipped cream or ice cream and enjoy! Any leftover pies, put canning lid and screw band on and store.

Oatmeal Streusel topping

4tbsp room temp butter

1/2 cup quick oats

1/4 cup brown sugar

1/4 cup flour

1/2 tsp nutmeg

1tsp cinnamon

combine all ingredients in a bowl using a fork or your hands until they resemble a streusel topping.

Apple Festival weekend = apples for Apple Oven Cake!

3 Oct

No matter what weekend the local Apple Festival is, it rains. It’s cold. It rains. The ground becomes a soupy mud mess that would be perfect for a spa day but no so much for a day of walking around looking at crafts and eating apple flavored food stuffs. Nevertheless, I was going to go and honor the yearly tradition of going to the apple festival with the boy. The one that began when we started dating in 1998. Rain and mud would not keep me away!!!

Diesel with his $3 apple festival toy. Who knew tied up fleece could be so pleasing??

So we donned our rain boots, grabbed the umbrella, and made our way to the Apple Festival. I needed apples for applesauce and apple pie filling, and this was where they were to be had for the best prices possible. The apple harvest was a good one this year. I purchased Jonathan apples, and they were HUGE this year!

I wanted to enjoy one of them before they made their trek to applesauce and pie filling, so I decided to make an apple oven

an apple that's as big as some people's heads...wonder how many servings this counts for...

mmm

cake. This cake is fabulous. It’s like a giant gooey sweet apple filled pancake. I love it. It’s a quick dessert to whip up for dinner and would also do well as a light breakfast with some scrambled eggs and a good cup of coffee. You need an oven safe pan for this recipe, but worst case if you do not have one, cook the apples in your pan, transfer them to a warm baking dish (like a pie dish that has been warmed in the oven for 15 minutes). Use whatever type of apples you like, but try to stick with something that is on the sweeter side.

It was a fantastic dessert to have after a hearty bowl of soup, washed down with some warm apple cider kicked up a notch with a cinnamon stick and some bourbon.

Happy Fall!

Apple Oven Cake

Adapted from Sunset Magazine, October 2009

Ingredients

  • 5 tablespoons butter
  • 1/4 cup packed light brown sugar
  • 1/2 teaspoon cinnamon
  • 1 sweet apple, peeled and sliced
  • 3 large eggs
  • 1/4 teaspoon salt
  • 1/2 cup flour
  • 1/2 cup milk
  • 1 tablespoon fresh lemon juice
  • 1 tablespoon powdered sugar

Preparation

  • 1. Preheat oven to 425°. Melt butter in a 12-in. ovenproof frying pan over high heat. Add brown sugar and cinnamon, swirling to combine. Add apple and cook until just starting to soften, about 3-5 minutes depending on the type of apple you use.
  • 2. In a medium bowl using an immersion blender, whirl together eggs, salt, flour, and milk. Pour egg mixture into pan and bake until puffed and brown, about 15 minutes. Sprinkle with lemon juice and powdered sugar. Serve immediately and enjoy!

Note: if you don’t have an immersion blender, you can use a food processor or blender. You just want the eggs, flour, milk and salt to mix nice and smooth without any lumps.

and it continues….pumpkin bread with streusel topping

26 Sep

I warned you. The pumpkin obsession continues with this lovely bread recipe topped with a delicious streusel that is not quite as unhealthy as one would expect! I found this recipe over on  Tasty Kitchen. My recipe is the one listed below, which has been modified slightly to meet my tastes. It’s a great bread. Moist and delish without that wet texture that some puree breads can sometimes get. The streusel topping is a great touch and adds a little unexpected crunch.

I love mine with some cream cheese or warmed up under the broiler with some real butter. It’s great at breakfast with some scrambled eggs, or for dessert after dinner.

This freezes fantastically as well, if you manage to have any left to freeze. Yield is 2 loaves.

Pumpkin Bread with Streusel Topping

Ingredients

  • ¾ cups Butter, Softened
  • ¾ cups Granulated Sugar
  • ¾ cups Brown Sugar
  • 2 teaspoons Vanilla
  • 4 whole Eggs
  • 2-½ cups Pumpkin Puree
  • 3 cups All-purpose Flour
  • 3 teaspoons Baking Powder
  • ¾ teaspoons Baking Soda
  • 1 teaspoon Salt
  • 2 teaspoons Cinnamon
  • ¼ teaspoon Allspice
  • ½ teaspoon Grated Nutmeg
  • ½ cups Buttermilk

FOR THE STREUSEL TOPPING:

  • ¼ cups Butter, Softened
  • ½ cups Brown Sugar
  • ½ cups Oatmeal
  • ¼ cups All-purpose Flour
  • 1 teaspoon Cinnamon
  • 3 tablespoons Ground Flax Seed
  • ½ teaspoon nutmeg

Preheat your oven to 350º F.

Spray two 8″ loaf pans with non-stick cooking spray and lightly flour.

For the topping – mix together all the topping ingredients using a fork or your hands until combined thoroughly.

In the bowl of your mixer, cream together butter, granulated sugar and brown sugar. Add in the vanilla and eggs and mix until just incorporated. Stir in your pumpkin puree.

In a separate bowl, add flour, baking powder, baking soda, salt, cinnamon, allspice, and nutmeg. Whisk the mixture together until it looks even and smooth.

Add half of the flour mix to the pumpkin mixture, blending well. Beat in buttermilk. Add remaining flour mix and beat lightly until smooth.

Pour batter evenly into the two prepared 8″ pans. Cover each with half of the topping mix.

Bake at 350º F for 70 minutes until a toothpick inserted in the center comes out clean. If additional cooking time is required, do so in 5 minute increments.

Remove from pans and let rest on cooling rack. Slice and serve.

If freezing, let cool completely and then wrap in a double layer of saran. To serve, let thaw in fridge overnight.

Streusel close up